
Here's how to create your own, amazing Plush!

Petunia- My Little Plush Tutorial
Sketch out a pattern.
Be sure to add enough width and height to allow for dimension. I usually add 1/2 to 1 inch around the perimeter. You can also add your seam allowances, but I prefer to add them when I cut my pattern out.
Use colored pencil to audition your fabric choices if you like.
This particular pattern fit on a 8 1/2" x 11" sheet of scrap paper. For larger patterns I do my sketching on news or kraft paper.
If this is your first pattern and you want to see how it will work, create a muslin body from your pattern to work out any design changes you may need to make. Its worth the extra time to create a good, workable shape. It took me a few awkward monsters before I learned what shapes work and what shapes don't.
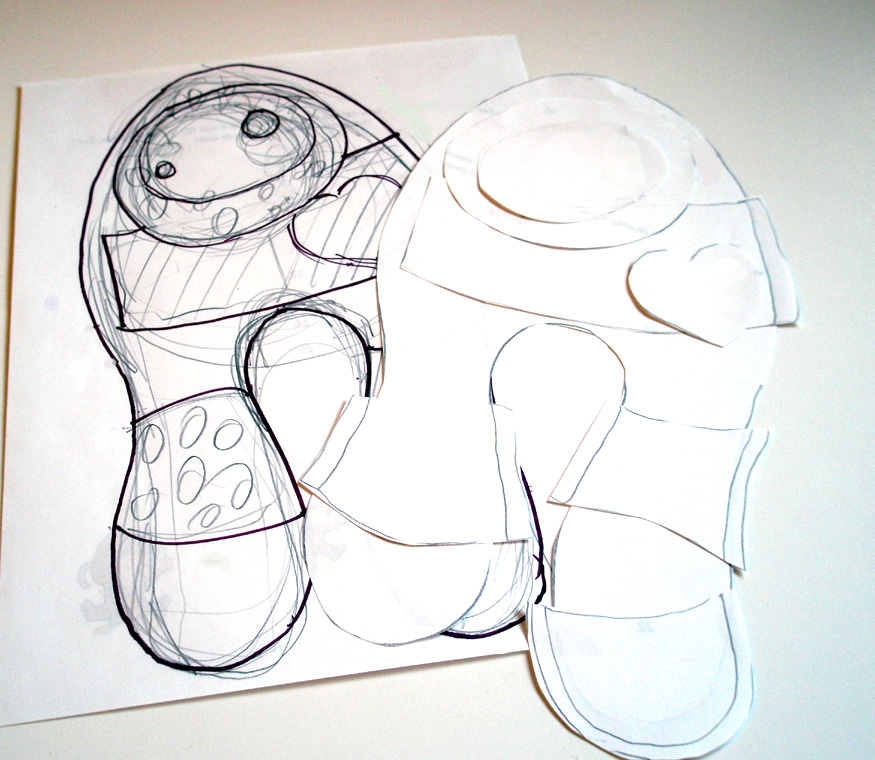
Create pattern.
Once your pattern is complete, trace each individual piece onto another piece of paper. Add seam allowances to out edges. (See image above.)
Choose your fabrics.


Go through your stash and choose some interesting fabric combinations. The sky is the limit! Cottons with raw edges have a great organic feel.Knits can be soft and cuddly. I've used pleather, lame, decorator fabrics, silk, taffeta, etc... Each has it's own personality. Colors can also have a big impact on your final creation. Blues are soothing, red is passionate, pink is girly, black can be spooky...play! Most creatures take less than a fat quarter. The trims can come out of your scrap basket.
Cut your pattern pieces.
Once you have decided on your sketch and your fabric, its time to cut the pattern pieces from fabric. Cut the main piece first, then the face and other shapes. If you have one shape on top of another, you will need to create those in layers. Each layer needs it's own pattern piece.
Lay them onto your fabric, pin and cut.

Sew each piece onto the main body.
Place pieces onto fabric to audition. I often make changes at this point. I may add or subtract colors, add more layers or remove pieces that aren't working. Keep an open mind. Working with scraps allows you to be playful.
Pin pieces and sew all pieces to front and back. Be sure to choose the right side of the main fabric pieces. Sew each layer separately, then sew layers onto main pieces.
When sewing each piece on, I like to add a decorative effect. I simply sew around each shape at least 3 times. I use wavy and wobbly stitch lines. This step anchors each piece down completely. If you would like to turn edges under, that is up to you, but I like the frayed look of raw edges. You could also use fusable web to attach each piece before you sew them down. Its totally up to you.


Put it all together.
Pin front and back pieces together, right sides together. Sew. Be cure to leave a 2-3 inch opening to allow for turning right side out. When using fragile fabrics, I may stitch a second seam just inside the first seam.


Clip curves and trim.
Clip curves (especially inside curves on legs and then trim seams if desired. Take care not to clip into the seam. I like using a pinking shears to keep fraying down to a minimum.


Turn right side out and stuff.
Be sure to stuff small parts with little pieces of stuffing, and larger pieces with bigger pieces. This keeps your limbs and body firmly packed without lumps or gaps. If your limbs are small, use a long nose pliers, tweezers or hemistat to get enough stuffing into each part. I use polyester fiberfill, but you can use any type of stuffing you have on hand.
Squish each part to be sure you are not leaving any gaps. Take care to add enough stuffing, especially around the joints and the head.
Sometimes I may add some dried beans to the bottom parts to weigh them down. This is optional. Note: if you want your plush to be washable, only use washable filling.

Close opening.
Whip stitch opening closed with matching thread. Use tiny stitches. Catch just a few threads from one side. Cross to the other side and pick up a few threads and pull tightly closed.

Now for the fun part!
Choose buttons and for eyes. Try out other trims. Experiment with a few different looks out before you choose the idea combination. This is where a great stash of buttons and trim pay off. Once you have decided on a final design, stitch your buttons and trims on. If you are making plush for children, especially those under the age of 3, it is better to use safety eyes or to embroider the eyes and other decorative touches. That way they won't come off and become a choking hazard. Safety first!

Add a few final touches.
I added the trim using embroidery thread. I added some decorative stitches as well.


Give your plush a name and you are finished!

Check out my Etsy Shop Fiberluscious and see my other plush characters!
Muriel Liwet Plush Angel


No comments:
Post a Comment