I know they sell kits for covered buttons. When your creative juices run in over-drive in the wee hours of the morning, impatience is often the mother of my inventions. Besides, I like mine a bit better. I love that I can make them any size I need. My buttons thick and juicy. I can use just about any fabric so they match my pincushions perfectly.
You will need just a few tools:
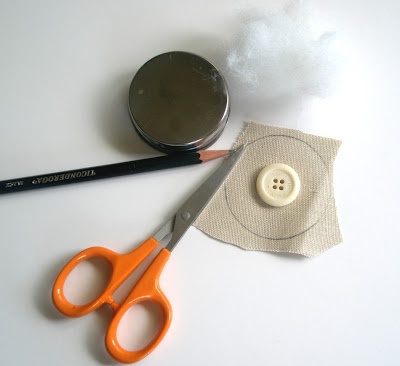
Fabric of your choice which may be plain or embroidered, a button, thread (heavy duty is nice), a pencil, and something round to trace a circle with. Oh, a sewing machine and hand sewing needles are also needed.

Choose your button. I use buttons I don't like. They just need to be slightly smaller than the size you want your finished button to be.
Trace a circle onto your fabric. The circle should be at least 1/2 inches larger than the button you will be covering. I am showing a piece of plain material. However, if you want to use an embroidered button, do all of the embroidery before you proceed to the next step.

I like to add stay stitching to the outer edges of my fabric. It keeps it from fraying while stitching. Stay stitching is simply a line of machine stitching just inside the line of your seam. Often it is used on bias edges and in garment construction.

Next run a line of gathering stiches around the outer edge of your fabric circle. If I have stay stitching place, my gathering stitch is just outside that line. I also may use heavy duty thread, hand quilting thread or upholstery thread. These will not break as you gather your stitches tight. Normal thread often usually won't break if it is doubled.

Add a bit of stuffing in your gathered fabric.

Now add your button.

Pull your gathering stiches tight. Knot off your thread. I like to sew back and forth to hold all the raw edges down tight so the back is nice and neat.

Your finished!

To attach your button to your pincushion, thread a long needle with matching thread. If your button has standard holes you can poke your needle through the embroidery stitches and into the button hole. Sew securely to your fabric using just a few stitches.
You can also begin with a shank button and allow the loop to remain outside of your gathered fabric.
I often will just begin by securing my thread to the back of my button. I then run that thread through my pincushion. I come back up along the side of my button and continue to sew the button down to my pincushion.
I suggest that you use whichever method suits your needs
Have fun and make all of your projects extraordinary!

11 comments:
Good idéa.
When you enjoy stitching into the wee hours you become inventive.
Love the idea! Thank you
Adorei a ideia é maravilhosa vou fazer, com a sua aula ficou muito bom obrigada.
I was reading your really nice explanations when I realized we could do the same with a piece of chipboard or hard plastic instead of a button! ;)
Time just runs away on me when I visit your blog Jill - I love everything you do!
I'm going to try an embroidered button tomorrow - thank you for all your inspiration!
Oh I've just been through your fabric stash again - it's sooo yummy!
Hugs
Shane
I had lost my access to my blog, just recovered it and found your fabulous work. Thank you the inspiration you still on us.
I should post on my blog the beaded wearable pins I made for a commission, if I make them smaller they'll work well as buttons.
I just love this pincushion ! Plan to make one of my own for a gift.
Thank you for posting your ideas, they have inspired me and I now have the desire to do embroidery work i have never tried.
This article is really impressive to all the embroiders for developing their skill, I really liked your writing & creativity skill now left chest digitizing with quality is possible by using our service.
Digitizing could be done on trees to make them more alluring and unique to grab the attention of customers. Left Chest Digitizing
I like this tutorial on covering Cover the button without a kit. Its very easy to understand and i must gonna try this one. Thanks for the tutorial; you blog is a great place to get inspiration about custom embroidery digitizing. Thanks.
Post a Comment